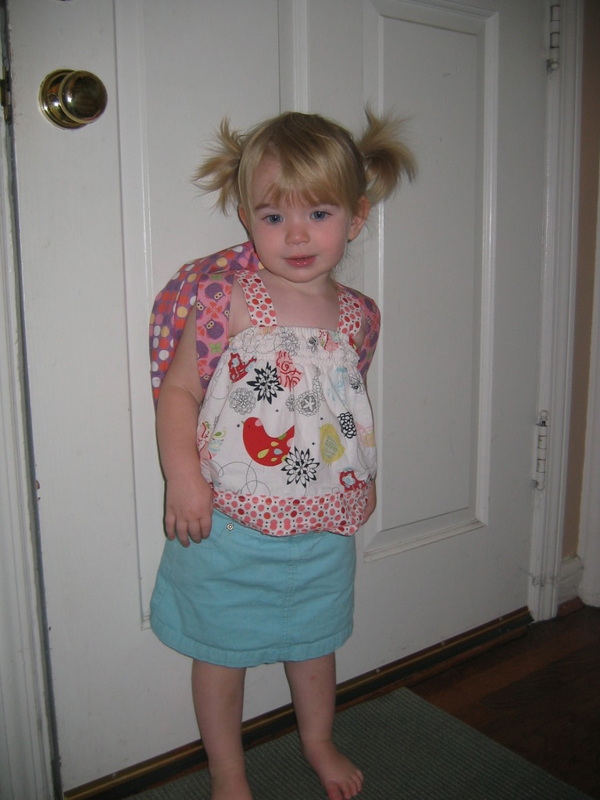
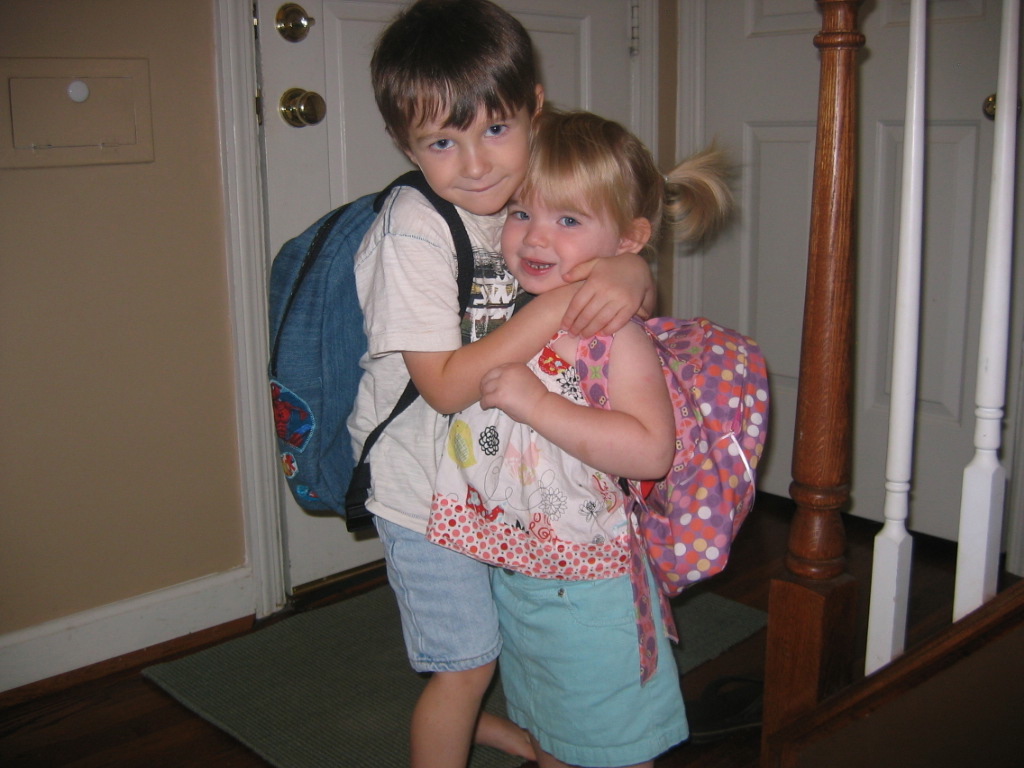
Back to school: what a sweet phrase that is! Max heads back to preschool (Pre-K, to be exact) and his little sister, Georgia, heads to a toddler program. Even though it’s been an insanely busy summer and I haven’t sewn in months, I knew that I couldn’t send the kiddos to school without some handmade decked-out backpacks. It was a great excuse for me to take the time to do some sewing again.
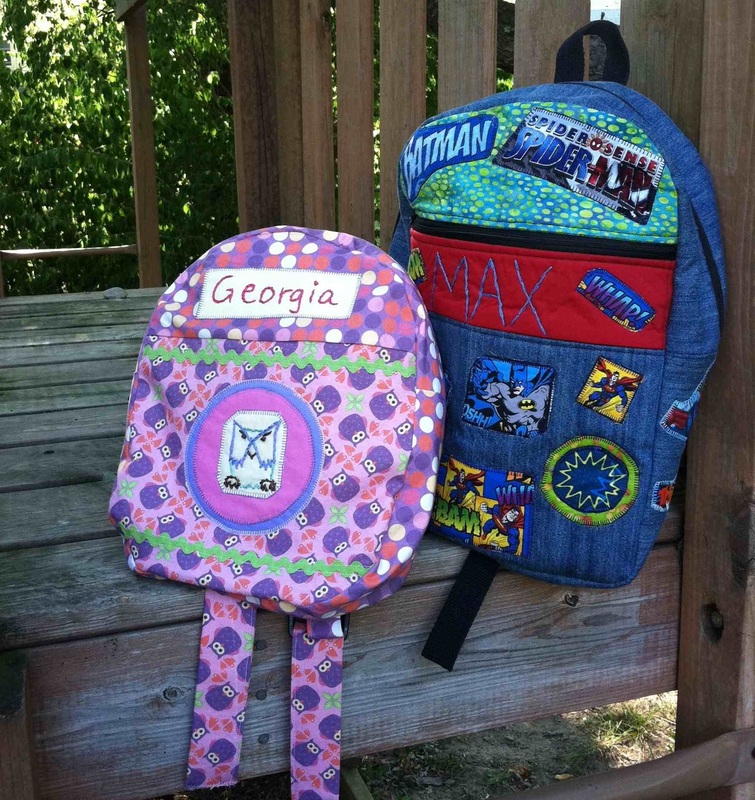
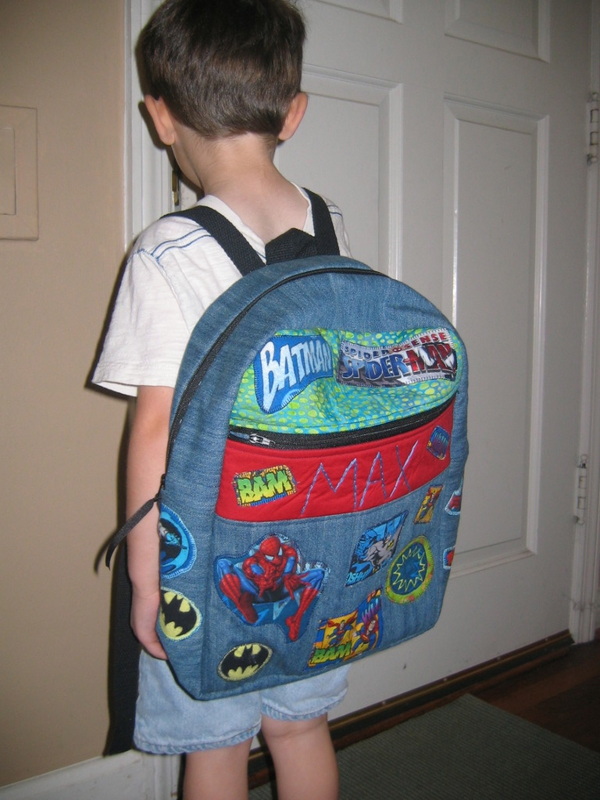
Georgia, bless her heart, has no idea that school is about to happen, or what in the world she needs with this backpack thing (she’s 2). But Max (4) had a very specific request for his back. He loved his Penguin Backpack from last year, but this year, he was ready for something a bit more grown up. And he knew exactly what. “I want Batman on one side, and Spiderman on the other. And mama, Superman too, if you can fit him.” No problem, kiddo!
Now, all summer long, my husband had been taunting me with back-to-school ads that show various superhero backpacks. “You could just buy one and be done now . . .,” he kept saying. As if. Do you even know me, dude?
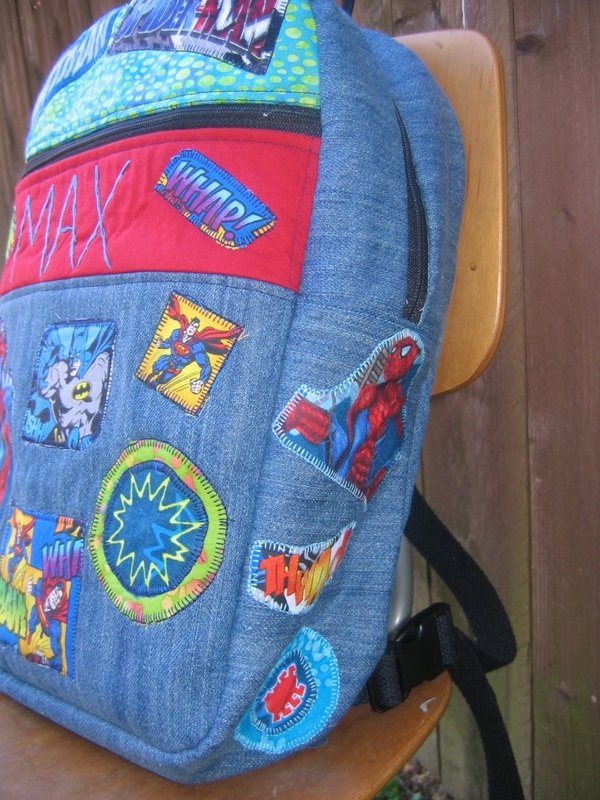
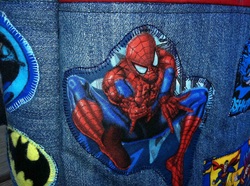
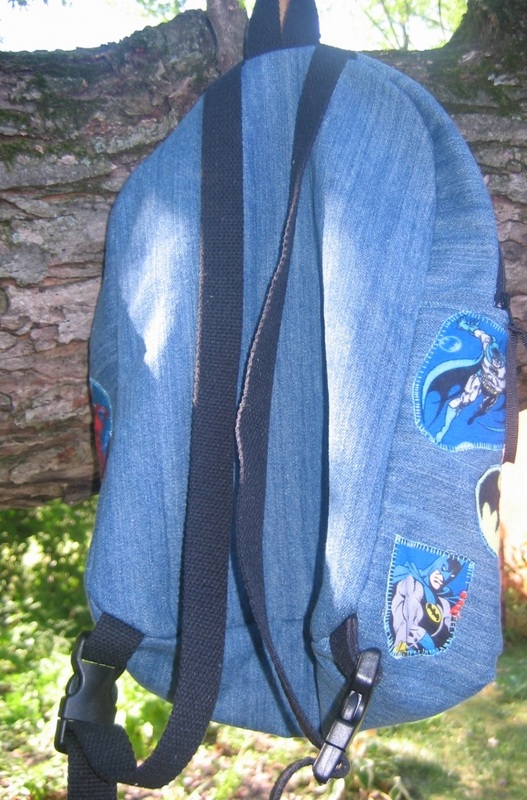
For Max, it took a while to find the right pattern (the toddler and preschool backpack tutorials I kept finding all looked too small). I actually wound up using Simplicity 1823. It’s quite girly looking on the pattern envelope, but I knew that I could boy it up with a superhero theme. I found some Spiderman, Superman, and Batman fabrics at Jo-Ann’s, and cut out various images to make appliques. For the main body of the backpack, I decided to use a basic denim, since I wanted it to be able to take some wear and tear (and I figured it would look good with the superhero red, white, and blue palette). I lined it with an inexpensive light blue cotton.
The pattern is a really good one actually: it’s very sturdy (lined, with both a layer of interfacing, and a layer of fleece). I’d say it’s a lot of sewing—not hard or complicated. Just a fair amount of seaming things together (although I was doing a bunch of appliques, so it probably felt like more sewing than it was).
I will say that there is one mistake in the pattern: it never tells you to cut out a lining piece for the front. But once I went to put the lining together, I realized I had only cut one for the back, as directed. So, I just used the back piece to cut out one for the front (the finished front is exactly the same as the back). No big deal.
I think the appliques turned out great, and I personalized it with his name. There may be other Maxes, and there may be other superhero backpacks, but there will be no other boys named Max with this superhero backpack.
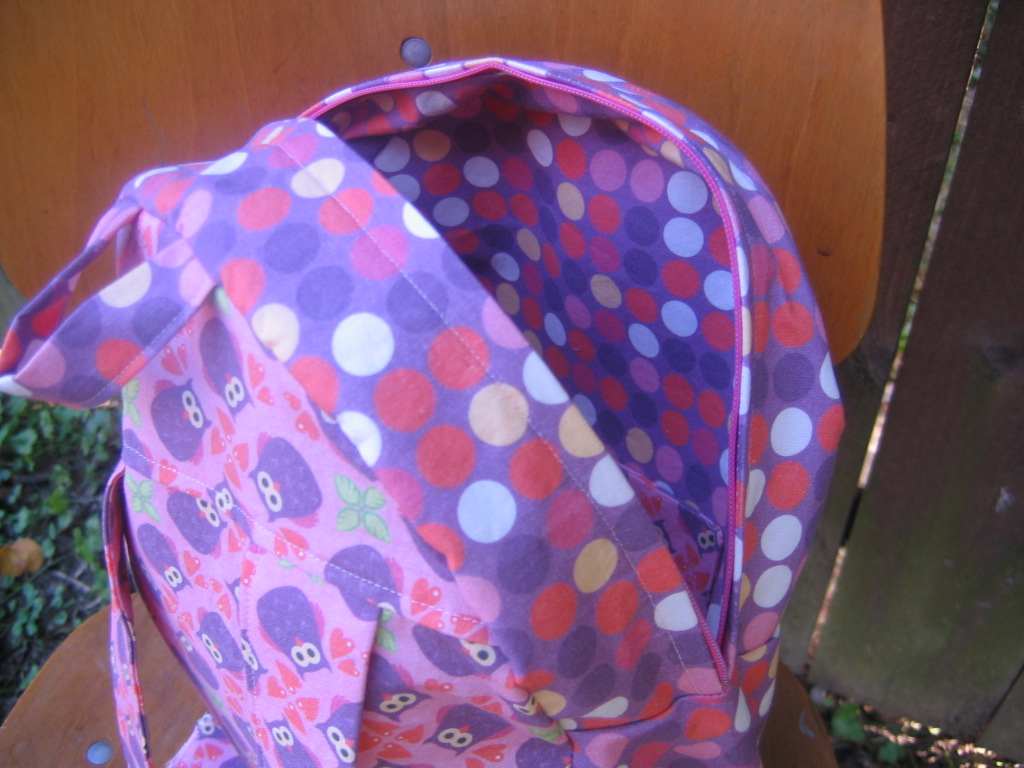
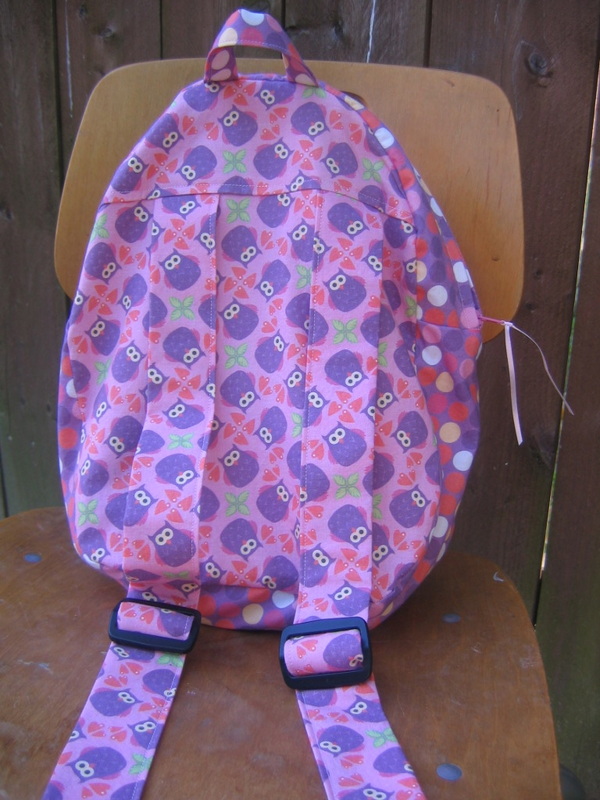
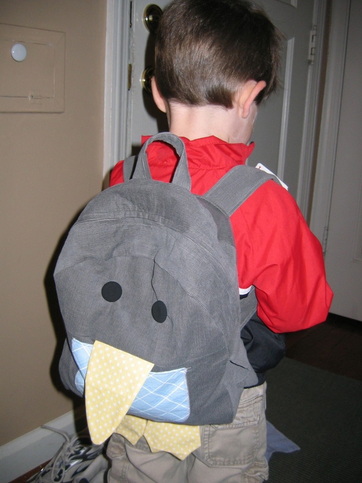
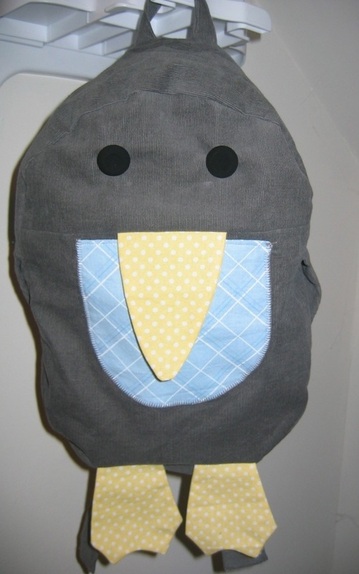
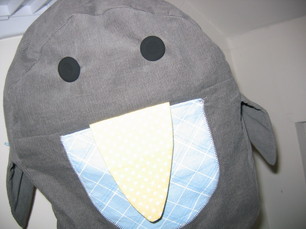
As for Georgia, I decided to go back to the wonderful Oliver + S pattern I used last year to make the Penguin Backpack (from the book Little Things to Sew). It’s smaller, but since she won’t have a homework folder or large art projects, it’s perfect. Instead of the penguin, I kept it simple, and did an owl motif. I found this fabric on Spoonflower, designed by Hamburgerliebe. I used an owl embroidery transfer from Sublime Stitching, and made a 3-layer applique, using some pink and purple solids I already had. A little rickrack, and the whole thing popped. And of course, I personalized it by appliqueing her name, too.
I highly recommend both patterns, even for beginners. I really like the way the Oliver + S pattern has you attach the lining (I wish I had used that technique to attach the lining of the superhero backpack, because it took a lot of pressing and a little tacking to get the lining to fit snugly). Don’t let the zippers scare you in either pattern. It’s really quite easy and workable to put them in. As for straps, the Simplicity pattern uses parachute clips, and the Oliver + S pattern uses traditional strap adjusters (you could do either though).
Sewing backpacks for the little ones got me back in the groove of sewing. I was completely burned out after a summer of demanding deadlines and zero free time. I forgot how meditative it could be to just sit and sew in the evening. So, stay tuned for more projects, tutorials, and giveaways!
First day of school: is there a sweeter concept than that? Especially after a long, hot summer. And an even longer Labor Day weekend.
I’ve accepted that I’m in a phase in my life where weekends just aren’t the leisure and loveliness they used to be. For example, 3-day weekends that alternate between so hot you can’t even go outside to freezing and raining, and involve a very busy 1-year-old, and a 3-year-old who still hasn’t quite gotten the hang of pooping in the toilet, really aren’t very fun.
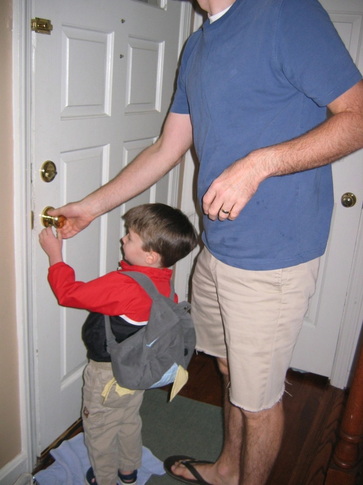
So I was thrilled to go to bed last night, and know that today, we could start over! It did feel like a fresh start this morning, as Max headed off to preschool with daddy, with his backpack strapped on his back like he knew exactly what he was doing.
Was I thinking: “ooh, my sweet little boy! I will miss him so much! How has he gotten so big, so fast?”
Um . . . no. I was thinking: “I am so glad I get to head upstairs and get back to work. And damn, that’s a good-looking backpack!”
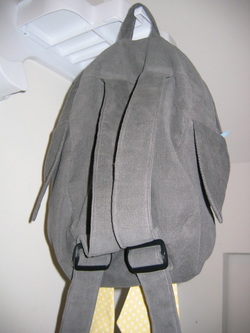
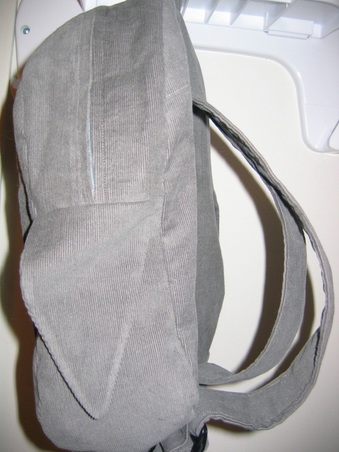
It’s a pattern from Oliver + S Little Things to Sew. I am digging this book sooo much, and I’ve already got about 6 other projects dog-eared. Max zeroed in on this backpack immediately. There was no “hmm, well, maybe, but can you make it out of Scooby-Doo fabric?” It was: “I want THAT backpack, mommy!”
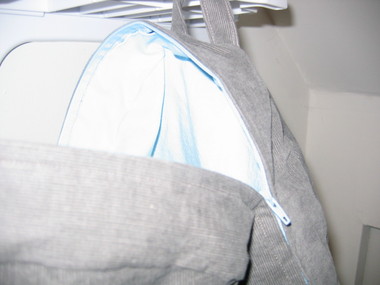
I pretty much matched the colors of the pattern: I picked out a grey corduroy for the body, a blue with a subtle diagonal plaid for the front pocket, and a yellow with a small white dot for the beak and feet. I lined the whole thing with basic light blue cotton broadcloth. I had a hard time finding the right-size strap adjusters at Jo-Ann’s, so I ordered some from Hardware Elf (they came within just a few days).
Overall, it’s really a fantastic pattern. There are a LOT of pieces (more than a dozen). As I was tracing the pieces and cutting them out, I began to wonder if I was in for something way more complicated than I anticipated. But it’s actually a very simple pattern, with very, very clear and smart directions. In fact, I learned a new way to make an outside pocket even cleaner at the top. The whole backpack is constructed beautifully—lined and reinforced in the right places. The directions for the zipper are good, although I sort of followed my own method (but don’t be intimidated if you’ve never done a big zipper—it’s super easy, I promise).
I wish it were just slightly bigger (the preschool instructed us to make sure the kids’ backpacks were big enough for their “homework” folder—and this one is, but just barely).
Overall, I can’t recommend this pattern enough for a kid's backpack, whether you want to do the penguin, or leave off the beak and feet and pick out a snazzy fabric.
And now, I’m going to enjoy the remaining hours of peace before I hear little feet scampering back inside . . .
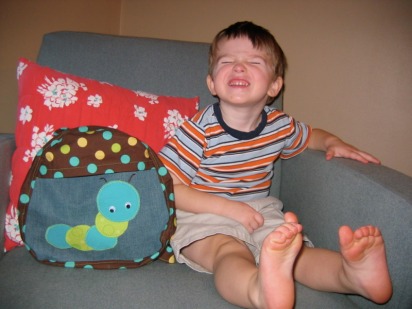
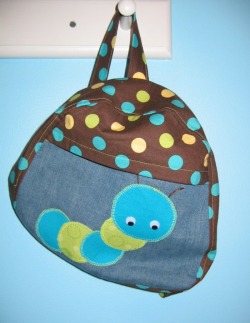
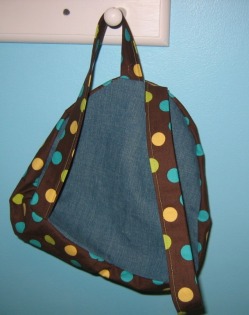
The school supplies are neatly stacked as we anxiously await our first day of pre-school! Without a doubt, Max is most excited by his new backpack. I wrote about it a few weeks ago when I was first planning it, and I have to say, I love, love, love how it turned out! As I mentioned in the previous post, I used this toddler backpack pattern from Indietutes (free, but she accepts donations via PayPal, if you’re so inclined). I definitely recommend this pattern, because it has a super simple shape, without snaps or zippers or anything complicated for a 2-year-old to negotiate. It’s on the small side, and I can see that we might have trouble fitting in larger pieces of artwork, but still, I wanted something that Max could easily carry on his back and not feel weighed down by—so from that respect, it really is the perfect size for a toddler.
I made the majority of the body out of denim, and then used a playful cotton polka dot print for the top flap, straps, and sides. Originally, I was going to line the whole thing, but once I fused all the interfacing to the pieces, I realized it was plenty sturdy as is. As for the pattern itself, the directions are very clear, and the pieces come together quickly and easily. I did modify the straps just slightly: she suggests folding the strap piece right sides together and turning, but I hate turning skinny strips of fabric, so I just pressed the edges up 1/4” and folded in half.
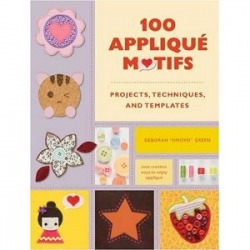
I knew that I wanted to do a fun appliqué, and as I wrote before, I got the idea for the caterpillar appliqué in the book 100 Appliqué Motifs. I simply traced some circular shapes I had on hand (the bottom of a paperweight and the bottom of a bowl) to make the body and head. I admit, my only worry is whether the caterpillar is boyish enough. It is so challenging to sew cute—but stylish—things for boys (I’m hardly the first mom to complain about this!). If you stray from the well-traveled path of basketballs and dinosaurs, it’s easy to start second-guessing yourself, especially when your husband gives you that look. (Anna Maria Horner has a great post about her husband teasing her about the fancy pants she makes for her one-year-old. But I’m sticking with my little lime and aqua caterpillar!
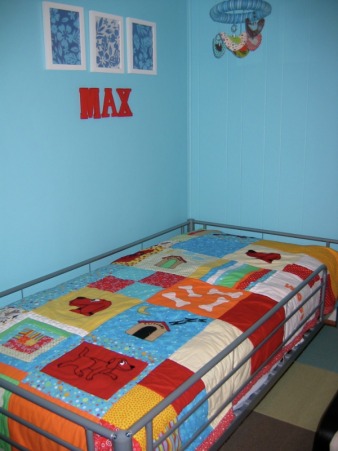
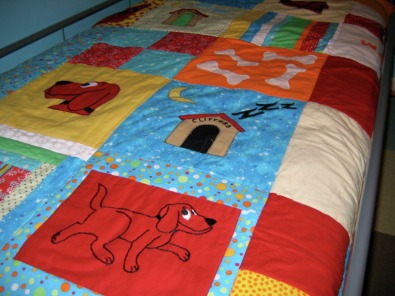
Three things are on my mind today. First, my baby slept in a big boy bed for the first time last night! All went well, except he somehow fell out (even with side rails) around 7:15 this morning, and then didn’t go back to sleep. Though he did lie there and talk to himself and play with his animals for almost an hour while I tried to go back to sleep in my room. I’m counting it as a success that he didn’t get out! He’s been super excited about the bed because I made him this Clifford-themed quilt, and gave it to him for his 2-year birthday a few weeks ago. Clifford is a big deal at our house, and Max was completely giddy last night when he finally realized that the Clifford quilt was going on his very own big boy bed!
I used both raw-edge applique and embroidery to make the Cliffords and Clifford-themed stuff.
I hope to do a tutorial about the quilt (I did both appliqué and embroidery). I’ll definitely offer some how-to in some fashion though, either actual templates or an explanation of how to make templates and transfer them.
Secondly, I’m working on Max’s backpack; he starts preschool in a month. How is it possible that my little boy is both sleeping in a regular bed and starting school?! We picked out the fabric for the backpack this weekend (he’s completely obsessed with saying “backpack” and every time he hears the word “school,” he shouts: “Backpack! Backpack!”).
I’m using a free pattern from Indietutes and doing a caterpillar appliqué from 100 Appliqué Motifs by Deborah “Ismoyo” Green (I can’t recommend this book enough for instant appliqué inspiration!). I'll post more on the backpack after I finish it.
And lastly, tonight at 7 p.m. is my book signing at Joseph-Beth Booksellers in Cincinnati! I have the feeling you have when you’re throwing a party and you think, “what if no one comes?” At least I know my family will be there! I’ve been so impressed by everything the wonderful people at Joseph-Beth have done to promote Sew Retro and the event tonight. I’ll be back with a full report on how it went!


 RSS Feed